Wednesday, April 9, 2014

Allergies - How We Handle Them


With allergy season rapidly approaching (or already here for some of you) I thought I would share how we deal with allergies in this house.  The little guy and I both have allergies.  His manifests with dark circles under his eyes and he looks "strung out".  Since he is only 4 I know the circles are not from any undesirable activities.  :)
He was taking kids Claritin every day to manage it but dang, that stuff is expensive!
I never had allergies till I was 25, then boom, like a light switch on my 25th birthday I suddenly had them.  Mine showed up in the form of full body itchiness and of course accompanied by sinus infections.  After going to an allergy doctor I think she said it was dust mites, something or other in the air, and maybe a few other things.  This was a while back and obviously I was not paying great attention, I just wanted it to go away.  So Zyrtec D is what I was given.  I took it for years, then halfway through my first pregnancy I was told maybe I should not be taking that. Oops. I was switched to the non D kind, then eventually to Clairinex.  Blah, blah, blah.  The point is, I was always on meds to keep the itching at bay.
Then I started using essential oils and found out about the amazing combination of lemon, lavender and peppermint.  There are a few ways to take it but I like to mix it in equal parts with a carrier oil (fractionated coconut oil, olive, grapeseed, jojoba, almond) and roll it on our feet in a roller bottle.  We do this in the morning and at night.  You could also put 3 drops in an empty gel capsule and take 2-3x a day but since I already make the roller for Maddox we just do it together.
We have been doing this since October and we are both off our allergy meds completely.  It took a few weeks of consistently using it to be totally off the meds but whoa it really works!  When allergy season gets really bad and I feel a little itchy I just do an extra application or two.  The key is consistency. At first we were not in the habit and we would forget and I would look at the boy and see his dark circles and remember.  Now we always remember. It has become a part of our routine and we will never go back.
Here is another blog post from Rebecca at Camp Wander who explains it a little more in depth and gives another testimonial.  She has a great blog and is very well versed in all things essential oils.  I learn a lot from her, go check it out.  http://campwander.com/2013/06/allergies-inflammation-power-of/

Need some oils? Here is a good place.
www.sparknaturals.com/?affiliates=157
Use coupon code Crunchyurbanmom for 10%off


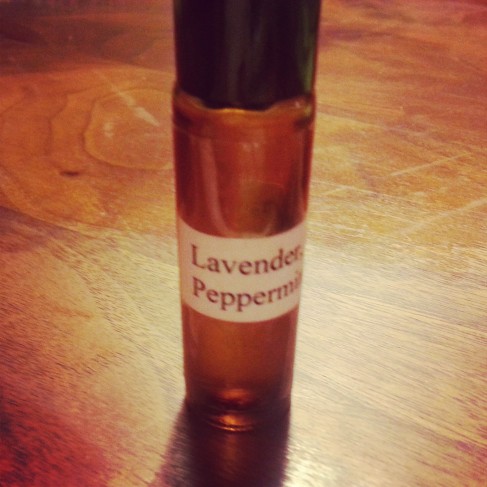
Here is what our little magic bottle looks like.  Very simple, yet effective.
Image


The recipe for LLP is easy.  You can buy the LLP blend from Spark Naturals already blended then add equal parts carrier oil, or you can mix up equal part lemon, lavender and peppermint with carrier oil.  Recipes would look like this:
In a roller bottle
30 drops LLP
30 drops carrier oil

 or

In a roller bottle
10 drops lemon
10 drops lavender
10 drops peppermint
30 drops carrier oil


-Crunchy Urban Mom


Friday, March 14, 2014

Oh Lovely Lavender

This month's Oil of the Month is Lavender!


Oh lavender, such a wonderful oil.  It is often called the Swiss Army Knife of oils due to its versatility. It is considered a calming oil and has lots of healing properties.  Lavender is in all kinds of commercially made products like soaps and lotions and for years I did not like lavender scented things. Then essential oils came into my life and I smelled REAL lavender.  Real lavender is so much better! It is also very gentle so it is great for babies and kids so it is one we always have around.

Here are lavenders healing properties:
Analgesic
Antibiotic
Antidepressant
Anti-inflammatory
Antiseptic
Diuretic
Disinfectant
Sedative
Antihistamine

Here are some ways lavender is commonly used:
Burns
Colds and Flu
Cuts and Wounds 
Headache 
Earache
Indigestion
Insect Bites
To induce sleepiness
Skin Issues
Eczema
Bruises
Calming
Vomiting/diarrhea
Acne, wrinkles
Repels Mosquitos
Linen Spray

This is a short list, there are lots and lots more!

As far as how to apply them, there are lots of ways to apply essential oils but here a few of my favorites.
  • Diluted 1:1 with a carrier oil (I use almond oil) in a roller bottle and apply to or near the affected area.
  • In a spray bottle with high quality witch hazel like Thayer brand. I usually do 6-8 drops eo per 2oz WH. 
  • Finger swipe the top of the bottle and rub on area.  Usually for a burn, owie or headache.
  • Put a little of Camp Wander's naked salve in my hand and a drop or two of eo and apply to affected area. (recipe here)
  • In a salve with eo's already added.  You can go wild here and make whatever your little heart desires!  Here are a few ideas to get you started.
  • In the neti pot with 1/2 tsp coconut oil.  My favorites for the neti pot are lavender, eucalyptus and frankincense. 1-2 drops max is all you need.  Remember the salt too or it hurts!
If you have not yet signed up for the Oil of the Month Club then you can follow the link below to do it.

The Oil of the Month Club is $15.99 a month and includes shipping and tax.  It is a recurring charge (that you can cancel anytime) and your oil will ship on the same day every month.

This month you get a free 5ml bottle of wild orange.  Hooray for freebies!


Be healthy friends!
Jen

Tuesday, February 4, 2014

Chia Pudding


My son is a dessert addict.  Every night after dinner he wants it.  Usually he just gets fruit, a singular cookie or some home made ice cream.  Tonight I found another healthy dessert that was a big hit - chia pudding!  We have had chia pudding several times but tonight we put a little twist on it.  Since a family favorite is mint chocolate chip ice cream, we decided on mint chocolate chip chia pudding.  Between Maddox, Mallory and I we finished off the whole jar we made.  It was pretty tasty!  Here is how you make it.  It takes about 5 minutes to throw together.

Here are the cast of characters.

Ingredients
1 1/2 cups almond milk (or your milk of choice)
1/3 cup chia seeds
1/4- 1/2 tsp vanilla
2 TBSP maple syrup

Process - (pay close attention, this is very technical)


Pour all your ingredients into a glass jar.


Give it a good shake.

Put the jar in the fridge.
In an hour or so go back and shake your mixture because it starts to settle at the bottom.
After about 4 hours it will be ready although it tastes even better if you let it sit overnight.

Mint chocolate chip - yummy!
Tasty add-ins


Now that you have your basic chia pudding made have fun and jazz it up, although it is yummy on its own! For mint chocolate chip I put 2 drops of peppermint essential oil into the jar, mixed it up and sprinkled on a few mini chocolate chips.
Of course you can also put fruit and other essential oils in your chia pudding.  Tangerine, wild orange and cinnamon would all be yummy choices!

If you don't yet know how awesome chia seeds are then you should go find out.  They are an amazing little super food that can do great things for your body, and they are tasty.  I get mine at Costco but you can find them here on Amazon too.

To get peppermint essential oil you can visit Spark Naturals at  http://www.sparknaturals.com/?affiliates=157. Use code crunchyurbanmom for 10% off your order.

Be healthy!
Jennie


Here is a little info on chia seeds to get you started.
http://www.huffingtonpost.ca/2013/06/03/chia-seed-benefits-_n_3379831.html
http://healthyeating.sfgate.com/top-10-health-benefits-chia-seeds-6962.html


Sunday, February 2, 2014

Ridding the Kitchen of Plastic

My initial thought was to write a post in regards to organization and upcycling, two of my favorite topics, but after learning more about the dangers of plastic, it turned into a kitchen overhaul. Let me explain how this amazing overhaul started.

During Chiberia, a clever term used by Chicagoans to describe the arctic temperatures we had for weeks, I was stuck in our house and started to see my house differently.  The rooms seemed smaller and my organizational gears started to move.  I was ready to de-clutter any closet or cabinet I opened.  I know, that might sound a bit crazy and overwhelming, but I was on fire.  You don't realize how much junk you keep but when you start going through drawers it is very clear that keeping all those little things: that old cell phone, that book you loved, a painting you did, it all accumulates fast. I was feeling pretty good after purging many items and seeing the donation boxes full. I knew it was time to tackle the pantry.

I tackled this pantry before when I purchased a few fancy smancy IKEA glass jars, but I still had a lot of plastic containers for all of my baking stuff.  When you are gluten free, you tend to keep a lot of baking ingredients on hand. I knew I needed to move these ingredients into glass jars. You see, I just recently learned more about plastic. We all know about BPA and how it is be linked to health problems.  What I did not realize was that it is hiding in other places because it is a major ingredient in polycarbonate plastics which are often used in other plastics.  The scary thing is that this may or may not be on the label.  Here are just a few places that unknowingly BPA lurks: canned foods, formula cans, some Nalgene and Sigg water bottles, milk jugs, baby bottles and sippy cups, toys, pacifiers, soda cans, and plastic dishware that is "microwave safe". Any time your food is touching plastic or a container that has BPA then you are ingesting small amounts. Studies have also shown that BPA is released 55 times more when exposed to boiling water.  The more contact you have with BPA the more chances you have at becoming sick. 

So you say, "I use all BPA free products now. I should be OK right?" Well it is a start but honestly, no, BPA is not our only worry. Have you heard of phthalates? They are a group of chemical "plasticizers" that are used in all kinds of products and they are even in the indoor air we breathe. It is believed that most of the phthalates in our bodies come from our food, most likely the packaging of our food. Phthalates are hormone disrupters and have been linked to low sperm count and low sperm quality. There was also a study where pregnant women with high levels of phthalates were more likely to have baby boys with subtle genital changes.  That is scary stuff!

In 2009, the Environmental Working Group (EWG) found an average of 287 toxins in umbilical cords of pregnant mothers and found BPA, mercury, fire retardants, pesticides, phthalates and many other toxins.  Our children are exposed to hundreds of chemicals before they are even born that can cause them problems early in life or set the stage for disease down the road.  It boils down to the fact that plastics are man made from chemicals, many from petroleum products. 

There is an overwhelming amount of information that is available on the dangers of plastics in our lives and so it did not take me long to I realize my kitchen needed to be free of plastic.  Now that I am aware of the dangers of plastics I could not serve my children on plastic dishware. I need to do my best to keep them safe from dangers, seen and unseen.  Plastic has become my enemy and I was going to free my kitchen of this dangerous chemical.  If you know my partner, this was going to be another fun conversation.

I woke up the next day and said, "Julie, I think we need to get rid of all the plastic in our kitchen". She did not answer how I thought she would.  I figured she would say something to the effect of, "there you go again, making some crazy changes!" But she didn't, she was really wonderful and supportive. The poor dear. She knows she cannot stop my crazy train once it is going, so she just said, "as long as you find a suitable replacement, I'm fine with it." I looked on the internet and read what others are doing and found some choices for dishware for the kids.  Here is what I found that works for us:

Use what the rest of the family uses
Stainless steel
Glass
Bamboo
Porcelin

When I was cleaning out my cabinets I found a lot of glass jars. What a great way to repurpose my jars.  I started to swap out the plastic containers with glass.  The only problem was the glass jars had the original labels from the manufactures.  Here’s a great tip. The best way to remove the labels off your jars is to soak them in vinegar water with a couple drops of lemon essential oil. After the label softens, scrape off as much of the label as you can. That last little bit of stubborn adhesive will come off with a small amount of straight lemon essential oil. Just put a drop or two on the sticky part, rub with your finger, and then wipe it off with a towel. Boom! Clean, pretty, safe, and FREE storage jars.


Check out some pantry pictures!
https://blogger.googleusercontent.com/img/b/R29vZ2xl/AVvXsEgtMqin8vMlNzxRwtPmLoQqrjoqWuMwvO_nDJY9tcnc6In8cEVkKcOig1TVaUHiHZGs0Gw4MkIub2CewaNnAgEQbxT3kWPVK1MZO94EN1PdwYV7AqyaO_sTZvq5d39r9MIccEP9dlULQaAt/s1600/20140126_171308.jpg
Just look at all that upcycling!

https://blogger.googleusercontent.com/img/b/R29vZ2xl/AVvXsEiPKsaswLRHbyxRGaf-zildmFVAAwXvZLJqN9nyNPbVz4a9L6sIiTKsLauAYYQvMtJ8FlX4Em-deRdFgPt8KZzSafP8Auh2YMUVxAtjsqaYKdq8dqt0Oz2bK19Oq0XG0ABBMLHIL6D_Z3EM/s1600/20140130_141050.jpg
Kitchen pantry, love my IKEA kitchen!

https://blogger.googleusercontent.com/img/b/R29vZ2xl/AVvXsEgm9LMkY2LlKAJnYuImSq5c5wWa64FJrhyphenhyphenONXWZVNHzkrdTVgYupVxftbwAAhdMGKMHw4iuk3EJDv3aqzDggwDw_LTtHQ0C0WU_Nj9RBAGzo9ZjQS_8RIagHClEYn-h77TpLnU3PDIzBUlk/s1600/20140130_141442.jpg
This is an overflow shelf downstairs that used to be cluttered with ziploc bags of stuff. It looks so much better now!

Replacing dishware can be pricey.  The most affordable way is to visit your local thrift store but my favorite one is temporary closed due to expansion.  So I decided to visit the restaurant supply store.  It is another great way to get affordable, durable, quality stuff.  Plus you can purchase matching sets which would be difficult at a thrift store. 

I came home with 8 tempered glass plates, 8 stackable glass bowls, 8 stainless steel cups (they are supposed to be for french fries but we will be drinking from them), metal 2 oz ramekins, stainless measuring cups and spoons, large stainless spoons, bamboo utensils and a small cast iron skillet to match the rest of our cast iron.

https://blogger.googleusercontent.com/img/b/R29vZ2xl/AVvXsEhGJ3JshhoLzBOM8vCPqW6dbgx4O9nXl5oj1yB_U5wJW08z4xgYPRcJoAV8GlySfGMVLmtWKePHPzJ6cBqC2FFppJBxegdfEOMRSS7ue71zDOQml0L33A5R7ccBVJqkFl9NPZCl22daswKq/s1600/20140129_174945.jpg
The kid dish drawer.
https://blogger.googleusercontent.com/img/b/R29vZ2xl/AVvXsEiIUmE-GyteTAJvUuPCt2zt0G24PoXCxROexC-Paqwini4TWoKZx98-cZxWVC01SWdfdCe7lJH71uyyoU359WlhE00tgzyxYAc5p6KvgFVfd-_Ih3_hHSaQCXwrG5k_4YecTf96RY54IY-H/s1600/20140129_132927.jpg
Here is how big the plates are that I choose, with my hand for size reference.


Our new "kid" plates are simple, classic, SAFE and can be used forever.  Maddox really likes them and  I love how they all stack up so easily.  

Another major item that needed addressing was sippy cups.  Both my kids really like the Avent soft sippy spout so I wanted to stick with that style, also I like the bottle/sippy/storage solution that that system offers with the sealing discs.  We used them a lot when we traveled for snacks and such.  My alternative solution was Pura Kiki.  It is basically the same system as the Avent and the nipples/spouts even fit both, but the cups are stainless steel instead of plastic.  They have silicone nipples, silicone sippy spouts and sealing disks that all work together.  We are going with 4 for now and hopefully that will be enough.  You can get them here on my Amazon store if you need some.

I have cleaned out 5 paper grocery bags worth of plastic from my kitchen. I cannot believe we had that much!  I feel really good about the changes and I like having less in our kitchen.  I am now be much more aware of the containers that our food comes in and that will be a driving factor in my food purchases.  I am realistic and know that I cannot eliminate all plastic from our food but I can make a conscious effort to avoid it wherever I can.

You know those little numbers on the bottom of your plastic containers? Here is what numbers 1-7 mean.  Check out this Mercola article to find out.


Now that you know the effects of plastics, here are some things you can do to avoid plastic in your daily life.

  • Replace storage containers in kitchen with glass or stainless steel.
  • Replace plastic drinkware for kids and adults with glass or stainless (find some options here).
  • Use your own glass, stainless or ceramic coffee cups when you go out.
  • Travel with your own water bottle that is glass or stainless. I never leave home without mine!
  • Take your own containers when getting take out, especially places that use styrofoam/#6 containers.
  • Use your own shopping bags at the grocery store, Target ,Wal-Mart or anywhere! Target and Whole Foods even give you credit for your bag and they hold much more than cheap plastic bags.
  • Never microwave in plastic. Really you should not even be heating food in the microwave, but more on that later.
  • Avoid canned food, including soda unless it specifically says BPA free on the can.
  • When shopping, be conscious of what you are buying and bringing into your home.
  • Say no to straws when dining out and switch to stainless ones at home.  We have them, they rock. Find some here
  • Ditch the produce bags at the grocery store and take your own reusable bags. Find some here.
  • Buy in bulk when you can, skip the packaging all together and you get just what you need.
  • Use cloth diapers on your babies. This is a personal favorite! Did you know if you have baby in disposables their diapers create 1/2 the household waste?
  • Make your own household cleaners.

I know there this was a lot of information but I felt it was important to share.  Let me know your thoughts on the subject.
When you know better, you do better.

Be healthy!
Jennie

Share the Love Essential Oil Giveaway


Some fellow oil loving bloggers and I have teamed up to do a Valentine's give away that we are calling the Share the Love Essential Oil Giveaway.

The prize will be:
  • Two Essential 4 Packs (Includes one 5ml each of peppermint, lemon, lavender and melaleuca)
  • Two 5ml bottles of Oregano
  • Two 5ml bottles of Shield
  • Four 10ml roller bottles for easy application
This is a great starter set for anyone who is interested in oils and wants to try them out.  It is also a great addition to anyone's collection since these are some of the most commonly used oils in any avid oiler's arsenal.  I know I am never without any of these!  Plus the beauty of it is that you get a set and you can share a set with someone you love, or some one who you want to be healthy anyway!


a Rafflecopter giveaway

Here are the contest details:
Contest ends February 10th at 9pm PST.
You must be 18 or older to enter.
The winning entry will  be verified.
The winner will have 48 hours to reply to an email before a new winner will be selected


Here is a list of other blogs that are participating in this giveaway.  Go check them out, I'm sure you will find so new pages you will enjoy following!


A Mouse In My Kitchen Patti's Place The Granola Mommy Life Inside Nickie's Little Bubble Just Trixie Bobbins N' Thread Clothesline Chic The Gray Area Abundance of Goodness Enjoy Life Anyway Natural Mama Curly Loves Essential Oils Backdoor Survival Haute Mess Mama Crunchy Urban Mama Simple Sunsets

Saturday, February 1, 2014

Oil of the Month - Marjoram


In case you have not heard about it the Oil of the Month Club, is a great way to stash up your oil collection.  You get a 15ml bottle of the month's chosen essential oil. It is $15.99 a month and includes S&H and tax.  The price is always less than what you would pay if you bought it on its own, so it is a great deal!  You can cancel anytime, although why would you?  Your order will ship out every month on the same day you signed up.  So if you signed up on the 5th of February then your order will process every month on the 5th.  It is that simple.

This month the Oil of the Month is marjoram.  Let me tell you about ole Marj.

Properties of Marjoram:
  • Analgesic
  • Antibacterial
  • Antibiotic
  • Antioxidant
  • Antispasmodic
  • Disinfectant
  • Expectorant
  • Sedative
Marjoram in my opinion does not get enough attention, it is good for all kinds of stuff.  Here are some uses:

  • Mix 1-2 drops in agave, honey water or juice for indigestion
  • Apply topically with massage to address sore muscles or joints. It can reduce pain associated with cold, fever, inflammation, exertion of muscles, toothache, headache and numerous other reasons. 
  • Apply direct to sprains, sore backs, or necks for antispasmodic effects. Because it is antispasmodic, this means it is helpful in curing nearly all types of spasms and related problems. It relieves spasm in respiratory system, intestines and muscular spasms within the limbs. It also helps reduce, or in some cases eliminate, convulsions, muscle pulls, cramps and spasmodic cholera which are caused due to spasms.
  • It is a great expectorant so it is effective for sinus issues, bronchitis, coughs, colds, and lung issues. Diffuse the oil or apply topically with a massage to the chest, neck, and lymph nodes at the onset of cold and flu or respiratory distress symptoms. It can be effective in curing infections from virus and ailments associated with them, such as common cold, influenza, mumps, measles and even pox. 
  • Menstrual issues and stress relief can also be addressed adding Marjoram to a warm bath.
  • It reduces, and in some studies stopped the growth of fungus which means it can help eliminate fungal infections such as athlete’s foot. 

Words of Caution: It has no adverse effects. However, pregnant women should avoid this.

A fellow blogger over at Patti's Place came up with this great diffuser recipe using marjoram.


To sign up for the oil of the month go to 

Your 10% off crunchyurbanmom coupon will not work for the Oil of the Month Club because the price is already so low, but it will work on everything else.
Be healthy, 
Jennie

Source


Remember, I'm no doctor or health professional.  I'm just a mom who is sharing what works for me and my family.  

Tuesday, January 28, 2014

Meet Haute Mess Mama

Hey friends, I want to introduce you to a friend of mine.  Her name is Lacey and she just started a blog called Haute Mess Mama.  She started using essential oils in November and is on a journey to make life more healthy for her and her family.  She is a born and raised Texan and has a heart of gold. Her adorable family consists of her, Haute Mess Papa Kevin, Haute Mess Baby Tennysin, and their fur babies Isabella and Dozer.  
We collaborate a lot and we will be sharing each others posts so we can give you more information that we think you will enjoy.  Go check her blog out at HauteMessMama or here on Facebook where she will be talking about God, family, cooking, crunchiness, DIY, essential oils, parenting [triumphs and struggles], and the kitchen sink! 

Just look at how adorable they are!


Be healthy, 
Jen